If you are converting journal from InDesign sources and you are also using Photoshop, you can prepare some more complex structures very fast and make transfer without having them laboriously re-drawn in Triobo. How to do it? The following procedure seems complicated at first, but the steps 3 and 4 and also step 8 will be made just once. So each subsequently transferred image is made with just a sequence of keyboard shortcuts without much thinking.
- Keep all properly installed any fonts in the system (otherwise the object in Photoshop may not display correctly)
- Mark Ctrl+C (Cmd+C) the entire group of objects
- In Photoshop press Ctrl+N (Cmd+N) for the new image. Change the default resolution of 72 px/inch to higher value: 180 px/inch works well for me, the resulting Triobo objects used as “HD” (ie for tablets with a retina resolution) have proportionally the same size. (When converting A4 journal to tablet desktop 768 x 1024 px.) You may also want larger objects, then select for example 200 px/inch.
- Does not worry about the dimensions, just confirm the dialog and a newly created image closes immediately.
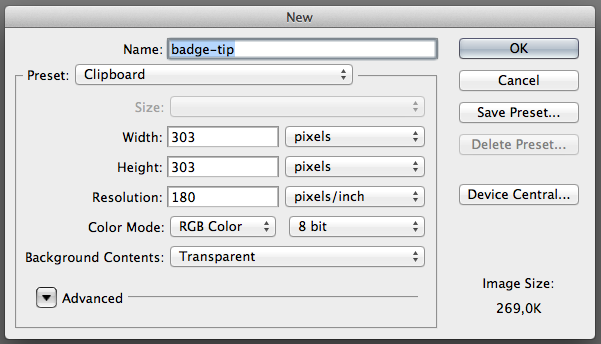
- Again press Ctrl+N (Cmd+N) again for the new image and notice following: the resolution is already set to 180 px/inch and pixel dimensions correspond to an object already on the page. Enter the name (already without diacritics and no spaces, e.g. badge-tip)
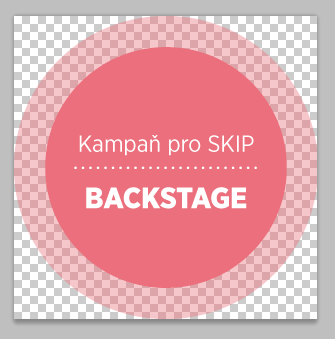
- Insert object in the page using Ctrl+V (Cmd+V) and confirm (Enter key).
- It occurs that frame of embedded vector object is slightly larger (less than 1 px) than image size. Especially with the rounded parts it can cause cropping, and the object will appear “clipped”. In such case press Ctrl+Alt+C (Cmd+Alt+C) and enlarge the canvas by few pixels.
- Create an action for quick saving to PNG if you do not have it yet. On your hard drive, create a folder where you will store all images (I got it in my documents as “Photoshop output”), then create actions: Save to web, format PNG , “Photoshop output” folder and directly add also an Close action. Assign keyboard shortcuts: On I have set Fn+F13 for PNG and Fn+F14 for JPEG.
- Press your shortcut key (e.g. Fn+F13), the image is saved and closed.
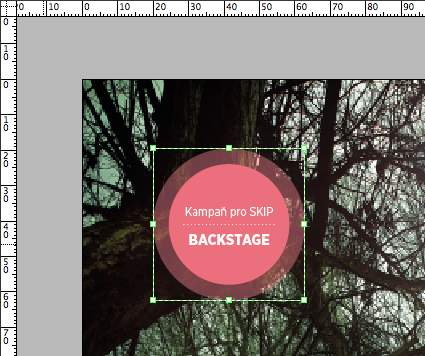
- Draw the image frame in Triobo, ignore the size for now. Press Ctrl+Shift+D (Cmd+Shift+D) for source setting, and from Photoshop output folder drag a newly created PNG image to the window and use it.
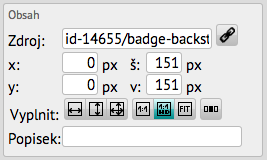
- Press icon 1:1 HD and then icon FIT. And you are done.